CSS ::after Selector with Example
The ::after selector in CSS is a pseudo-element that is used to insert something immediately after the content of each selected element(s).
You can use the ::after pseudo-element to add insert decorative elements, icons, or additional text after an element using the content property without changing the HTML structure. It can also work in combination with the ::before pseudo-element if you want to add content both before and after an element.
By default, the ::after pseudo-element is inline, meaning it will behave like inline elements in CSS. However, you can make it block-level using display: block or display: inline-block.
The ::after selector doesn’t change the actual DOM (Document Object Model) structure. It simply adds visual content on the webpage without actually existing in the HTML code.
Syntax of Using ::after Selector in CSS
The general syntax for using ::after pseudo-element along with content property to insert something is as follows:
selector::after {
   content: "";
/* Additional CSS styles properties */
}
In the above syntax, selector specifies the HTML element that you want to target. For example, p, h1, and div. The content property defines the content to be inserted after the selected element. It is essential with ::after pseudo-element to insert something.
Without it, you cannot display pseudo-element. The value of content property can be text, symbols, images (using url()), or an empty string (“”) for styling effects.
Basic Examples of CSS ::after Selector
Let’s take an example in which we will add “Scientech Easy” after a paragraph element.
Example 1:
<!DOCTYPE html>
<html>
<head>
<style>
p::after {
   content: "Scientech Easy";
   color: white;
   background: red;
   padding: 3px;
}
</style>
</head>
<body>
    <p>Welcome to </p>
</body>
</html>
Output:

Let’s take another example in which we will add a download icon after the text content via Unicode characters.
Example 2:
<!DOCTYPE html>
<html>
<head>
<style>
a::after {
   content: " \2193"; /* Unicode for down arrow */
   color: green;
   font-size: 1.2rem;
}
</style>
</head>
<body>
  <a href = "#">Download</a>
</body>
</html>
Output:
"Download ↓"
Here, a down arrow is added after the “Download” text in the link, which indicates a download action.
Example of Adding Icon After Button with ::after
With ::after selector, you can add an icon or symbol after a button to make it attractive.
Example 3:
<!DOCTYPE html>
<html>
<head>
<style>
button::after {
   content: " ➔";
   color: blue;
}
</style>
</head>
<body>
    <button>Submit</button>
</body>
</html>
Output: A blue arrow (➔) will appear immediately after the “Submit” text in the button.
Example of Creating a Badge or Notification Indicator
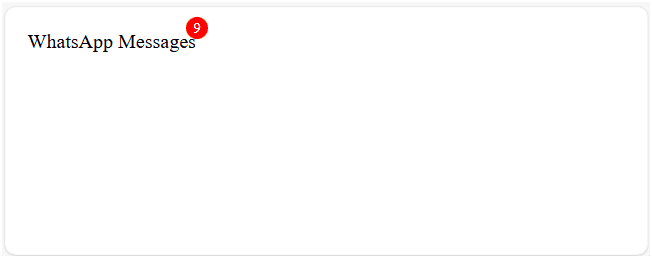
You can create a badge or notification indicator using ::after selector.
Example 4:
<!DOCTYPE html>
<html>
<head>
<style>
.notification {
   position: relative;
   display: inline-block;
   padding: 10px;
}

.notification::after {
   content: "9";
   position: absolute;
   top: 0;
   right: 0;
   background-color: red;
   color: white;
   border-radius: 50%;
   padding: 2px 6px;
   font-size: 12px;
}
</style>
</head>
<body>
    <div class="notification">WhatsApp Messages</div>
</body>
</html>
Output:

As you can see in the output, a notification circle appears on the top right of the “WhatsApp Messages” element, displaying the number 9.
Example of Adding Background Image Using ::after
You can also add a background image after the selected element. You can also control the positioning and size of the label or background image using additional CSS properties like display, background-size, position, width, and height. Let’s take an example of it.
Example 5:
<!DOCTYPE html>
<html>
<head>
<style>
.badge::after {
   content: "";
   display: inline-block;
   background-image: url('new arrival.jpg');
   width: 300px;
   height: 100px;
   margin-left: 10px;
   background-size: cover;
}
</style>
</head>
<body>
   <div class="badge">Buy One Get One Free</div>
</body>
</html>
Output:
In this tutorial, you learned CSS ::after selector through various examples. The most common mistake happens when the beginners forget to include the content property while using ::after pseudo-element.
Note that without it, the ::after pseudo-element will not appear. I hope that you will have understood the concept of using ::after pseudo-element in the combination with other selectors.


