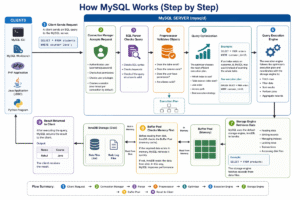
In this tutorial, we will learn how to create a database in MySQL step by step. Creating a database is the first and most important step when you are working with MySQL. Whether you are building a website, web application, or any data-driven system, it is essential to understand how to create and manage databases in MySQL.
A database in MySQL is a collection of structured data that allows you to store, organize, manage, and retrieve data efficiently. For example, a school database may contain student records, while an e-commerce database stores product details and customer information.
To create a new database in MySQL, we use the SQL command known as the CREATE DATABASE statement in MySQL. Let’s first understand this statement in detail.
What is CREATE DATABASE in MySQL?
The CREATE DATABASE statement in MySQL is an SQL command used to create a new database where you can store, organize, and manage data. It allows you to define the database name along with optional properties such as character set and collation, which control how text data is stored, sorted, and compared.
Syntax to Create Database in MySQL
To create a database in MySQL, we use the following SQL command:
CREATE DATABASE [IF NOT EXISTS] database_name
[CHARACTER SET charset_name]
[COLLATE collation_name];
In the above syntax:
- CREATE DATABASE → This is an SQL keyword used to create a new database in MySQL.
- database_name → The name of the database to be created. It must be unique within the MySQL server.
- IF NOT EXISTS → An optional clause that tells MySQL to check whether a database with the same name already exists before creating it. If the database already exists, MySQL will not create a new one and will not throw an error. Without this clause, MySQL returns an error if a database with the same name already exists.
- CHARACTER SET → Optional. It defines the default character set used to store text data in the database (e.g., utf8mb4).
- COLLATE → Optional. It specifies the collation, which determines how character data is compared and sorted. In simple terms, it is a set of rules for text comparison and ordering.
Rules for Naming a Database
There are the following important rules that you should remember while naming a database in MySQL:
- The database name must be unique within the MySQL server. You cannot create two databases with the same name; otherwise, MySQL will return an error.
- Database names should not contain spaces because they can cause syntax errors. Instead, use an underscore (_) to separate words. For example, student_db is a valid database name, while student database is invalid.
- You should avoid using special characters such as @, #, $, %, etc., as they may lead to errors or compatibility issues. For example, ecommerce@2025 is an invalid database name.
- You should always choose a meaningful name that clearly describes the purpose of the database. This makes it easier to understand and manage, especially in large projects.
Steps to Create a Database Using MySQL Command Line
When you install MySQL on your computer system, the MySQL Command Line Client is installed by default. It allows you to interact directly with the MySQL database server using SQL commands.
The MySQL Command Line Client provides a text-based environment where you can execute SQL queries directly. It allows you to create, manage, and manipulate databases using SQL commands.
To create a database using the MySQL Command Line Client, follow the steps below:
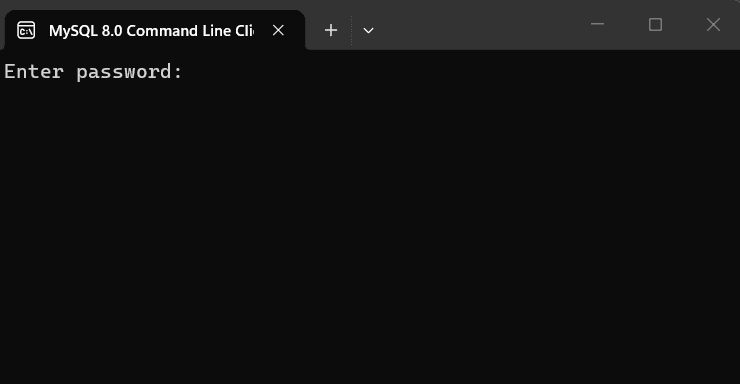
Step 1: Open MySQL Command Line Client
Search for MySQL Command Line Client in the Start menu and open the application.
Step 2: Enter Password
Once the client is opened, enter the MySQL root password that you set during installation.
Step 3: Show Existing Databases
Run the following command to see all databases currently available in the system.
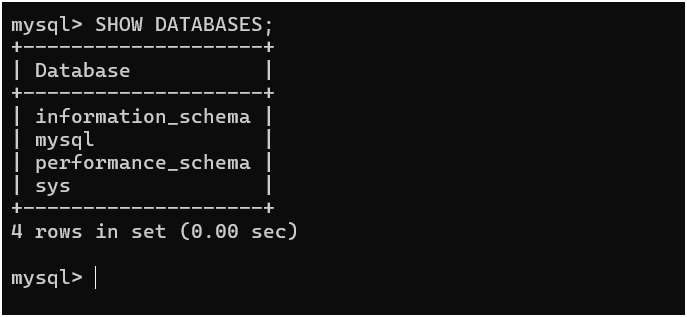
SHOW DATABASES;
The SHOW command in MySQL displays the information about databases and the tables in them. It keeps track of the contents of your databases.
Output:
Step 4: Create a New Database
Type the following command at MySQL command prompt to create a new database.
CREATE DATABASE IF NOT EXISTS School_db;
Output:
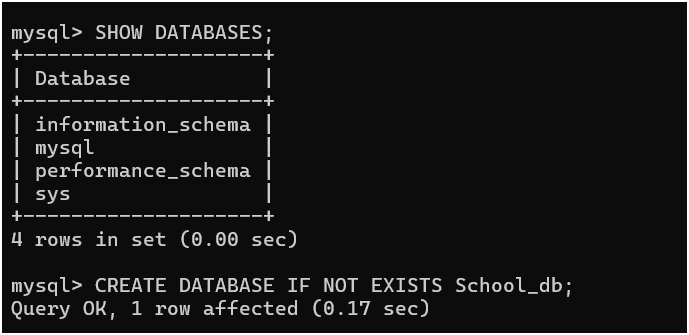
The above query will create an empty database that does not contain any tables.
Step 5: Verify Database Creation
To check whether the database is created or not, run the following command again.
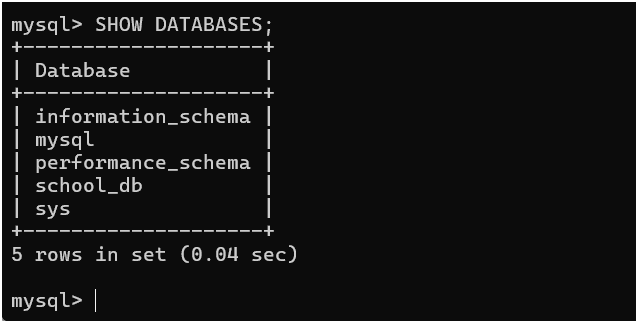
SHOW DATABASES;
Output:
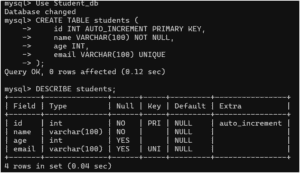
Step 6: Use the Database
To start working with the database, execute the following command at the MySQL command prompt:
USE School_db;
Creating Database Using MySQL Workbench
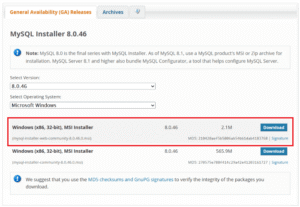
MySQL Workbench is a graphical user interface (GUI) tool that allows you to create, manage, and interact with MySQL databases visually. To use this tool, you need to install MySQL Workbench on your system.
To create a database through MySQL Workbench, follow the below steps:
Step 1: Open MySQL Workbench
Search for MySQL Workbench in the Start menu and open the application.
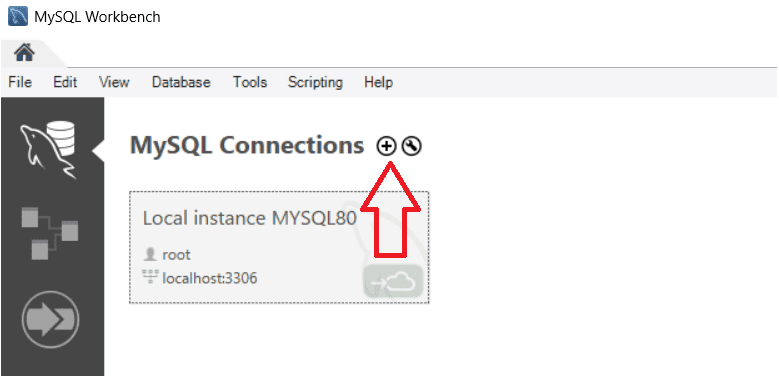
Step 2: Create a Local Connection
Click on the MySQL instance connection icon to create a new local connection.
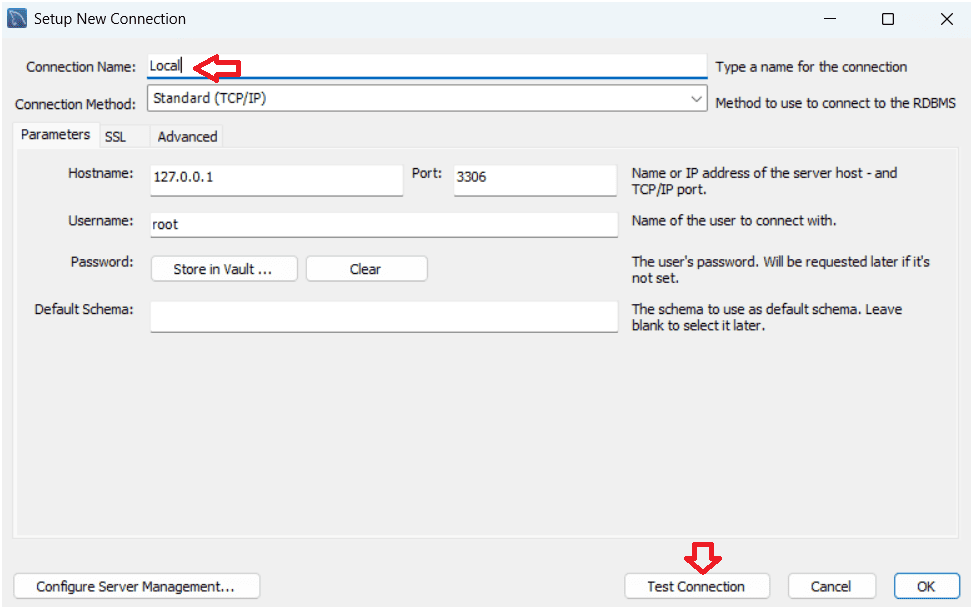
Step 3: Configure Connection
Type Local as the connection name and click Test Connection.
Step 4: Enter Password
Enter your MySQL password that you set during MySQL installation.
Step 5: Verify Connection
If the connection is successful, a confirmation message will appear with parameters defined for this connection.
Step 6: Open the Connection
Now click on the created Local instance connection to open the database dashboard.
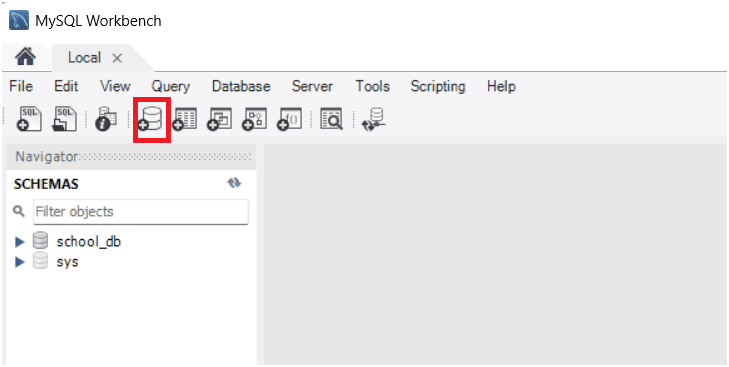
Step 7: Create Database Schema
Click on the Create Schema icon in the toolbar to create a new schema on the connected server.
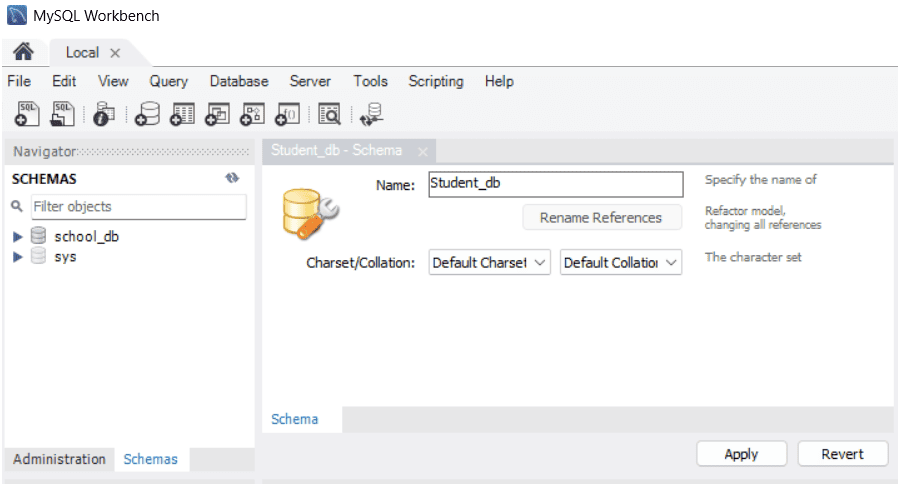
Step 8: Enter Database Details
Type the database name and optionally select the character set and collation, then click on the Apply button.
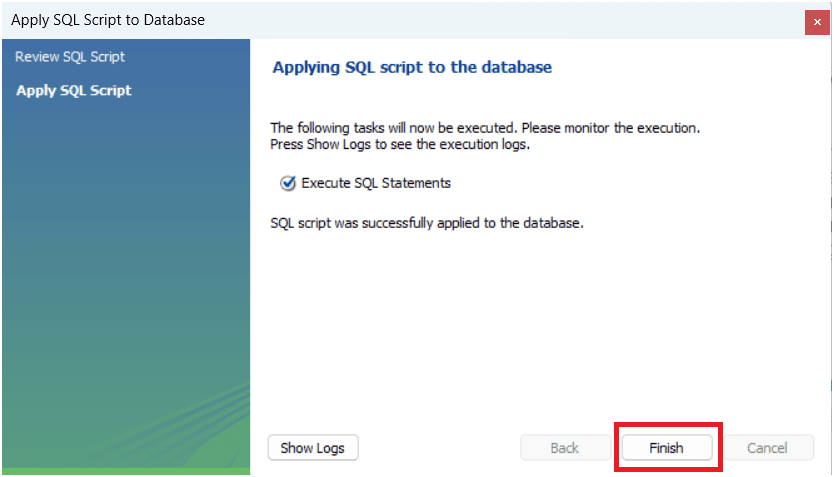
Step 9: Apply Default Settings
Click Apply again without changing the default settings.
Step 10: Finish Database Creation
Click on the Finish button to complete the database creation process in MySQL Workbench.
Step 11: View Created Database
You will now see the created database with database name Student_db listed in the left-side schemas panel.
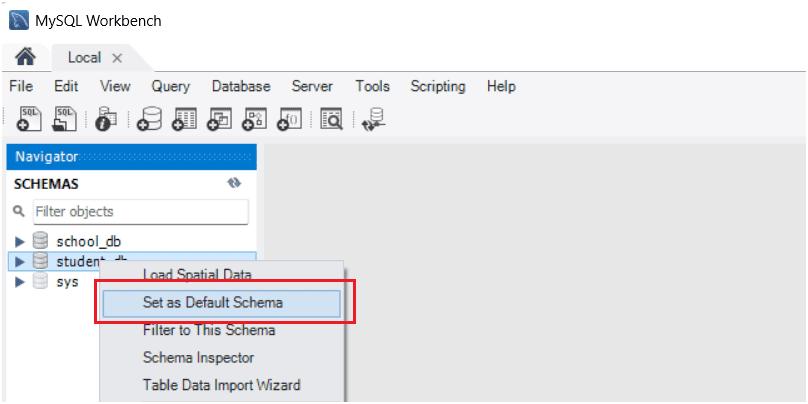
Step 12: Set Default Schema
Right-click on the database you created and select “Set as Default Schema” to make it the active database. Your database is now ready to use.
Real-Life Example of Creating Database
Let’s understand this step by step with a real-world scenario. Follow the steps below:
Step 1: Create the Database with Character Set and Collate
CREATE DATABASE website_db
CHARACTER SET utf8mb4
COLLATE utf8mb4_unicode_ci;
In this created database:
- website_db → This is the name of the database for the website.
- utf8mb4 → Supports all types of characters, including emojis and multiple languages.
- utf8mb4_unicode_ci → Ensures proper sorting and comparison of text data.
In real life, you can use this database for a website or web application, such as an e-commerce site, blog website, or online learning platform.
Step 2: Select the Database
USE website_db;
This command tells MySQL that you want to work inside the website_db database. All subsequent operations, such as creating tables, inserting data, or running queries, will be performed within this database.